- Plug in the power supply and connect the GTN with the HDMI/VGA cable
- Connect the USB cable to the pc and plug it into the USB2 port in the GTN
- Got to the Windows ‘Display’ settings and select the GTN monitor
- Select the ‘Portrait (flipped)’ display orientation

5. Once you have installed the “Altura_External_GPS.exe” software, the launcher will send you in to a driver install.
Follow these steps during the installation:

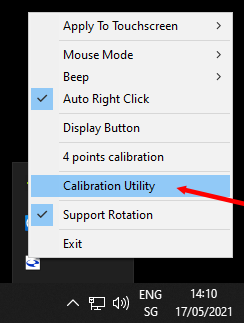
6. Right-click the eGalax Touch application in the taskbar ‘hidden icons’
menu:

7. Click ‘Calibration Utility’ to open the settings:
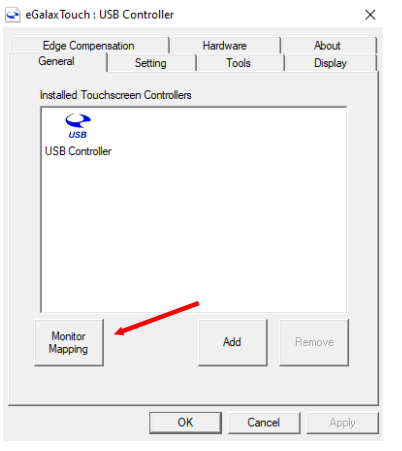
8. Click on ‘Monitor Mapping’ and follow the instructions (press the space
bar until the screen appears on the GTN and use the touch screen to click
the ‘Please touch here’ field):
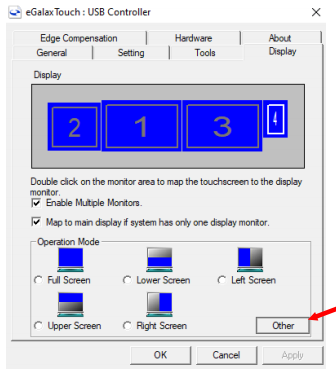
9. Click on ‘Display’ and make sure that the GTN Monitor is selected
Make sure that both boxes are ticked (at least the top one) and click on
apply:

10. Click on ‘other’:
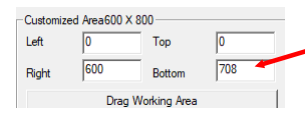
11. Select ‘Customized’:

12. Change the ‘Bottom’ from 800 to 700 and click on ‘Apply’:
13. Go to ‘Tools’ and click on ‘Linearization’ to calibrate the display:
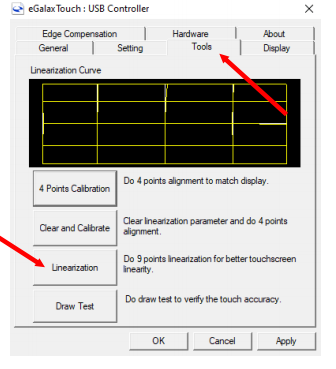
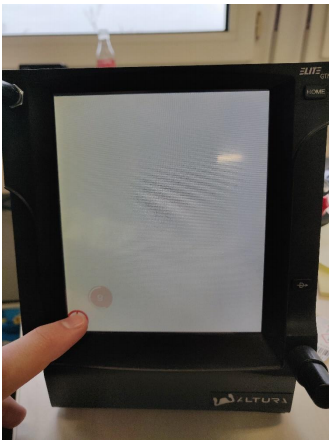
14. Follow the calibration instructions (click and hold the buttons on the
touch screen) – it will save the calibration automatically:
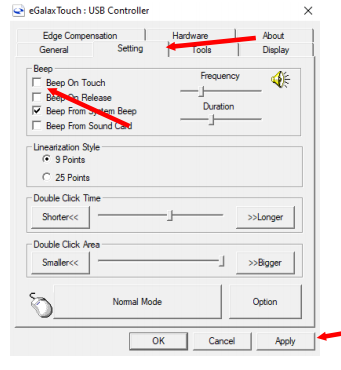
15. To disable ‘Beep on Touch’ go to the ‘Setting’ tab and untick the box and
click on ‘Apply: